You might have heard about Google My Business, probably it is the reason you are here! Well, if speculations go right, you heard that possessing a Google My Business Page is the one-way ticket to creating a robust online presence for your brand.
Well, you heard right! People don’t just surf the internet anymore, they “Google.” Hence, the maximum number of your target audience is right under Google’s nose. Thus, with the help of a My Business page, you can generate leads, get conversions and be visible to customers.
How? Well hold your horses and keep reading!
Today’s blog will discuss about the Google business page, and steps to set up one.
So, without wasting time,
Let’s Get Started
Introducing Google My Business

(GMB) or Google My Business is a dashboard which is simple, free and used by both small and large scale brands today. The GMB assists in updating business listing which is then featured across the Google Ecosystem.
After several alterations and maneuvering, this CRM feature was introduced by Google to make life simpler for both brands and web audiences. This allows users to search for a business in Google and find answers not based on the NAP concept (name, address, phone number).
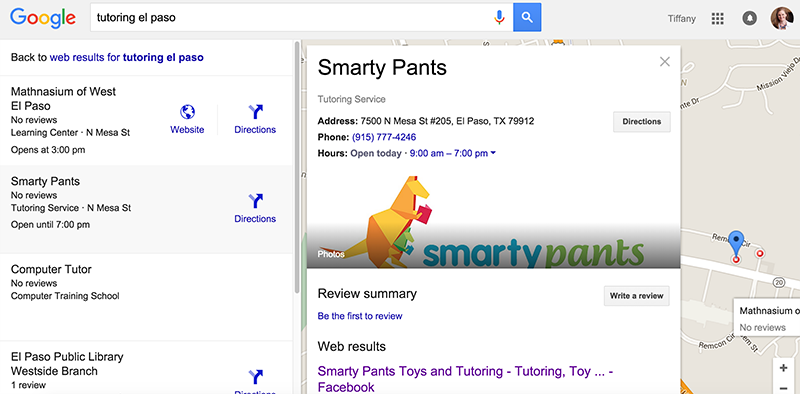
Almost all data on brand is available owing to the My Business listing. From a brand’s peak business hours, opening hours, parking options to facilities available, every detail is listed via My Business to offer web users enhanced search experience.
However, as good a value Google My Business offers the web audience, brands too can do a lot of things if they own a Google Business page.
Check it Out:
- Google My Business allows the generation of reviews. This means if your customers leave good reviews there is increased chances of your business listing being featured at the top.
- One of the most incessant perks of Google My Business is that as mentioned it allows your brand to make a strong presence online. What’s more? It also offers insightful data on a brand’s online presence with access to Google Analytics as well as Google Adwords.
- As per Synup, the dashboard used by GMB is very simple and allows one to monitor and manage their business across numerous Google Platforms.
Now, apart from this, you can add the following information on your GMB –
- Brand name and basic contact information (NAP)
- Accessibility
- Working hours
- Website
- Business Category
Moving on, now that you’re aware of what the Google My Business Page is and does, time to learn the steps to set up one.
Excited?
Well Here Goes!
Step 1: Start with the My Business Page Setup

The first step to creating a GMB is signing into Google Account and clicking the “Start Now” button on this given link. Once you do visit the Google Plus page and look for the option, ‘create a business page.’ and hit ‘create a page’ option.
You will be requested to fill in the business category. So, pick the category that conveys purpose your business organization well. You can pick by company, genre, brand, entertainment, business organizations and more.
Now, as per the category selected, you’ll further be offered subcategories for describing your brand. For example, say you listed brands then you’ll be asked to fill in the types. For example, antiques, apparels, appliances, collectables etc.
Step 2: Add Basic Data
Once you’re done with selecting category time to move on to basic information regarding your brand products and more.
Here all you need to do is pick a page name and link it to an external website (optional). Now, this, as mentioned, isn’t a must, but adding a website that has detailed information on your brand and products will only work to magnify your business.
Now, once you have filled out the additional data page, you’ll need to click on, “I agree to the Pages Terms and I am authorized to create this page.”
However, as per Smallbiztrends it is advised to go through Google plus page terms to understand any latent policies on content, Suspension & Termination, contests etc.
Step 3: Time for Customization
The next step is crucial to make your business appear human and that is customization. So, personalize your Google Plus by adding a profile picture to your account. You can do this by either uploading a picture or extracting pictures via a Picasa account if you have one.
Along with this also add a suitable and high-quality cover picture. Try to keep these images relevant to your brand. You can add a logo, a motto, your company image etc, for making the images meaningful.
After this, you need to add ten words that describe your brand perfectly. Make this short, crisp, to the point and unique, kind of like a tagline. Also, ensure this tagline goes with other descriptions you have written on your brand.
Once you are done with this, add the basic information like contact, address, phone number, chat, email, fax, pager, etc. After this, select “finish” and you’re done with page personalization.
However, the procedure is far from over. The next process involves managing your Google Plus Page with the help of your administration dashboard. In there you’ll find the “About” section where you can add a few details on your brand for better networking options.
Next up is the People option, which will help you fathom how the web audience is viewing your page. For instance, you can group website users under team members, customers who like your page, VIPs etc.
This will help you find out other businesses who have added to the circles and aid you in following those sections of groups as well.
Now, after this, it is time to edit the Story for the introduction page. Finish this off by describing your brand/business. Keep in mind to use keywords familiar to your niche and make last-minute necessary alterations. Additionally, add relevant and useful social media links for more exposure too.
Step 4: Add Content
Your GMB allows you to add content via 300-word posts. Just like an FB post you can write crisp, short and engaging content to make your post circulate among your group. To make these more concrete and powerful attach useful videos and links to your content.
Also, to make interactions more flexible, Google today offers navigation tabs situated below the Google Plus business page. These tabs are moreover, visible to the web audience who are coming to view your page.
Step 5: Add Images

Images are powerful tools that can get loads of visitors to your page. So apart from the cover, and profile pictures add loads of exterior, interior and preferred to give your customer an insight into what it feels like when one enters your business store.
Also, adding team and product images is a good way to convince customers that your brand is human and down to earth.
Step 6: Adding Insights
One of the best parts of Google My Business is that it offers an insight option to track analytics. This means you can track how many users click on your page and analyze the incoming traffic. Further, the GMB also allows one to find out how customers land on the page as per direct and discovery.
Via direct one can find users who are specifically looking out for your business online. On the other hand, Discovery leads those web audience to your page who found you one the basis of the information you provided. Further, with this insight, a brand can also keep track of the phone calls you receive as based on the insights offered.
Step 7: Review Managing
It is no secret that reviews are crucial for your GMB! After all, 84% of consumers trust online reviews, hence, your online reputation must be is spik and span. What’s more? The better review you have the more likely is your brand to show up in search listings.
This is why with a few tips you can monitor how your reviews appear on search –
- Practice using a review handout generator
- Request your consumers to use reviews. As per a survey, 7/10 consumers leave reviews when requested.
- Utilize review widgets
- Respond to comments and interact.
Step 8: Verification

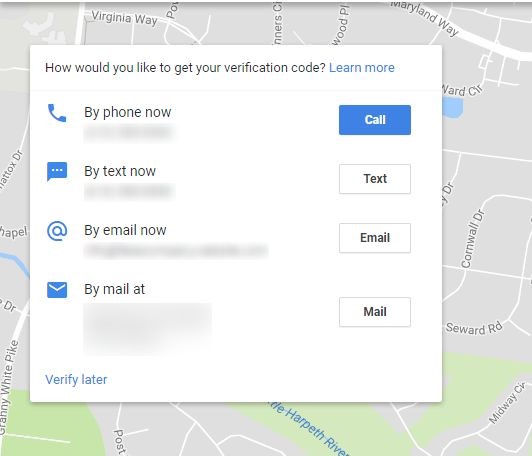
Once you’re done with filling out the forms and customization, it is time to verify your business via text, phone, and email.
If these methods aren’t feasible then you can verify your presence via a postcard. All you require doing is providing accurate data, and not changing any address info for 12 days.
By then the postcard will arrive with the verification code. After you get the code do the following:
- Sign in to your account.
- Look for the ‘Manage Location’ option.
- Click on the ‘enter code’ button.
- Enter the 5-digit code and you’re done.
As soon as you’re done, Google will channel you towards your business page, there hit ‘continue’ and your business listing is verified.
Well, there you have it! Following these 8 steps, you can easily set up your Google My Business Page and ensure your brand substantial exposure. Now, boost traffic and gain visibility the smart way by becoming a proud owner of a GMB page. All the best!
Related Blogs:

